Inspiration by La Redoute
Get inspired

#LAREDOUTE
Inspired by you
Inspired by you
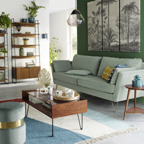
Your style inspires us!
#lovelaredoute @laredoute_uk
Be part of our community and share your style photos with us.
Handy advice, style tips and more...
Here to help!